Saturday, February 1, 2025
Master Your Craft with These Detailed Woodworking Plans
Master Your Craft with These Detailed Woodworking Plans
Woodworking, a craft steeped in history and precision, demands both artistry and technical skill. This comprehensive guide delves into the essential elements of crafting detailed woodworking plans, empowering you to transform raw lumber into exquisite creations. From conceptualization to final finish, we will explore the intricacies of plan development, ensuring your projects are not only aesthetically pleasing but also structurally sound and safe.

Phase 1: Conceptualization and Design
The foundation of any successful woodworking project lies in meticulous planning. A well-defined plan minimizes errors, optimizes material usage, and ensures the final product meets your expectations. This phase involves translating your vision into a tangible blueprint.

Defining Project Scope and Objectives
Before diving into intricate details, clearly articulate the project's purpose and desired outcome. Ask yourself: What is the intended function of the piece? What are its key aesthetic features? What materials will be used? Defining these parameters early on prevents scope creep and ensures your efforts remain focused.
Sketching and Preliminary Drawings
Begin with freehand sketches to capture the overall design and proportions. These sketches serve as a visual roadmap, allowing you to explore different design iterations and refine your concept. Pay close attention to the relationships between various components and their spatial arrangement.
Creating Detailed Working Drawings
Once the initial design is solidified, transition to detailed working drawings. These drawings should be precise, including dimensions, angles, and joinery details. Consider using specialized woodworking software or drafting tools to ensure accuracy. Include notes specifying materials, hardware, and finishing techniques.
- Orthographic Projections: Utilize multiple views (front, side, top) to represent the object's three-dimensional form accurately.
- Isometric Drawings: These 3D representations offer a clearer visualization of the project's overall structure.
- Detailed Views: Enlarge critical areas, such as joinery details, to ensure clarity and prevent misinterpretations.
- Material Specifications: Specify the type, grade, and dimensions of lumber required for each component.
- Hardware List: Include a comprehensive list of all necessary hardware, such as screws, bolts, hinges, and dowels.
Phase 2: Material Selection and Preparation
The quality of your materials directly impacts the final product's durability and aesthetic appeal. Selecting appropriate lumber and preparing it correctly is crucial for a successful outcome.
Choosing the Right Lumber
The selection of lumber depends on the project's requirements and your budget. Consider factors like species, grade, moisture content, and dimensional stability. Hardwoods generally offer superior strength and durability, while softwoods are often more affordable and easier to work with.
Assessing Lumber Quality
Before purchasing lumber, carefully inspect each board for defects such as knots, cracks, and warping. Select boards that are free from significant imperfections to ensure the structural integrity of your project. Assess the straightness and consistency of the grain pattern.
Preparing the Lumber
Proper lumber preparation is essential for achieving precise cuts and accurate joinery. This often involves:
- Planing: Removing any irregularities from the surface to create a smooth, flat plane.
- Jointing: Creating a perfectly straight and square edge.
- Rip Cutting: Cutting the lumber to the required width.
- Cross Cutting: Cutting the lumber to the required length.
- Moisture Metering: Checking the moisture content to ensure it is within acceptable ranges for your specific project and climate.
Phase 3: Construction and Assembly
This phase involves bringing your detailed plans to life. Accurate cuts, precise joinery, and methodical assembly are key to creating a structurally sound and aesthetically pleasing piece.
Accurate Cutting and Shaping
Utilizing appropriate tools, such as miter saws, table saws, and hand saws, execute precise cuts according to your plans. Employ jigs and fixtures for repetitive cuts to maintain consistency and accuracy. Ensure squareness and avoid any deviations from the specified dimensions.
Joinery Techniques
The selection of joinery techniques significantly influences the strength and aesthetic appeal of your project. Consider the following:
- Butt Joints: Simple, but require strong glue and often additional reinforcement.
- Lap Joints: Offer more strength than butt joints, with various subtypes like half-lap and through-lap.
- Dovetail Joints: Extremely strong and visually appealing, but require more skill and precision.
- Mortise and Tenon Joints: Strong and versatile, suitable for various applications.
- Dado Joints: Used for shelving and other similar applications, offering good strength and stability.
Assembly and Clamping
Assemble the components carefully, ensuring proper alignment and adherence to your plans. Use appropriate clamps to hold the pieces securely in place while the glue dries. Avoid excessive clamping pressure to prevent warping or damage.
Phase 4: Finishing Touches
The final phase involves enhancing the appearance and durability of your finished project. Proper finishing protects the wood and enhances its natural beauty.
Sanding and Smoothing
Sanding is crucial for creating a smooth, even surface. Start with coarser grit sandpaper and gradually progress to finer grits for a flawless finish. Pay attention to detail, ensuring all surfaces are smooth to the touch.
Applying Finishes
A wide variety of finishes are available, each offering different levels of protection and aesthetic qualities. Consider the following:
- Stains: Enhance the wood's natural color and grain pattern.
- Paints: Provide a durable and protective coating with a variety of colors and finishes.
- Varnishes: Offer excellent protection against moisture and scratches.
- Polyurethanes: Durable and water-resistant, available in various sheens.
- Shellac: A traditional finish that creates a warm, amber tone.
Final Inspection and Quality Control
Before declaring your project complete, conduct a thorough inspection to ensure it meets your expectations and is free from defects. Check for any imperfections in the finish, loose joints, or other issues that may need attention.
By meticulously following these steps and applying careful consideration to each stage, you can elevate your woodworking skills and create exquisite pieces that reflect your craftsmanship. Remember that patience, precision, and a commitment to detail are the hallmarks of a master woodworker.
Personalized Woodworking Plans for Tailored and Custom Creations
Unlock Your Inner Craftsman: Personalized Woodworking Plans for Tailored Creations
Tired of generic woodworking projects that lack personality? Yearning to build something truly unique, reflecting your style and skill? Then step into the exciting world of personalized woodworking plans! Forget sifting through generic designs; discover how customized blueprints empower you to create furniture, home décor, and unique gifts perfectly tailored to your vision. This isn't about following instructions; it's about designing and building your dream project from the ground up.

The Power of Personalized Woodworking Plans
Personalized woodworking plans offer a level of control and customization unavailable with pre-made kits. Imagine crafting a stunning bookshelf perfectly fitted to your living room's alcove, or building a custom-sized coffee table that complements your existing furniture. This level of precision ensures a flawless fit and a truly integrated piece within your home. It's not simply about functionality; it's about creating a lasting piece of art that speaks to your individual taste. These plans aren't just instructions; they're blueprints for your unique creative expression.

Beyond the Generic: Tailoring to Your Needs
Forget cookie-cutter designs. Personalized woodworking plans allow you to specify dimensions, materials, and even intricate design elements. Do you envision a rustic, farmhouse-style table or a sleek, modern coffee table? Perhaps you need a specialized storage solution for your workshop, or a custom-built toy box for your children. With personalized plans, you provide the specifications, and the plan adapts to your exact requirements. This ensures the finished product not only looks fantastic but also performs its intended function flawlessly.
From Concept to Creation: The Personalized Process
The process of creating personalized woodworking plans typically begins with a consultation. You'll discuss your vision with a skilled designer who will help refine your ideas and translate them into detailed, workable blueprints. This collaborative approach ensures your project reflects your aesthetic preferences and technical capabilities. The designer will consider factors such as material selection, joinery techniques, and overall structural integrity to create a plan that is both visually appealing and structurally sound.
Steps to Your Dream Project:
- Initial Consultation: Discuss your project's purpose, style, and dimensions.
- Design Development: The designer creates detailed plans based on your specifications.
- Plan Review and Refinement: You review the plans and suggest modifications as needed.
- Material Selection: Choose the wood species and finishes that best suit your vision.
- Construction: Follow the customized plans to build your one-of-a-kind project.
Investing in Your Craft: The Benefits of Personalized Plans
While the initial cost might seem higher than pre-made plans, the benefits are significant. Personalized woodworking plans save you time and frustration by eliminating the need to adapt generic designs to your unique needs. The detailed blueprints minimize errors, reducing material waste and ensuring a successful outcome. Moreover, the pride and satisfaction of crafting something truly unique far outweighs any additional expense. You're not just building a project; you're building a legacy.
Embrace the possibilities of personalized woodworking plans. Transform your woodworking hobby into a journey of creative self-expression. Start designing your dream project today!
Woodworking Projects for Beginners: From Simple to Advanced Builds
Woodworking Projects for Beginners: From Simple to Advanced Builds
Woodworking offers a rewarding blend of creativity, problem-solving, and tangible results. Whether you're drawn to the artistry of fine furniture or the practicality of functional items, the world of woodworking welcomes all skill levels. This comprehensive guide provides a structured progression of woodworking projects, starting with beginner-friendly tasks and gradually increasing in complexity, ensuring a satisfying learning experience for aspiring woodworkers.

Phase 1: Foundational Skills & Simple Projects
Before embarking on ambitious builds, mastering fundamental woodworking techniques is crucial. This initial phase focuses on developing essential skills and confidence through straightforward projects requiring minimal tools and materials.

Project 1: Simple Wooden Coasters
This project serves as an excellent introduction to basic woodworking techniques. It involves cutting square pieces of wood (approximately 4x4 inches), sanding the edges for smoothness, and optionally applying a finish like varnish or paint. The focus is on learning to use a saw (hand saw or miter saw) accurately and safely, and mastering the art of sanding to achieve a smooth, professional finish.
Skills Developed: Measuring, cutting, sanding, finishing.
Tools Required: Measuring tape, hand saw or miter saw, sandpaper (various grits), wood glue (optional), finish (optional).
Materials Required: Small pieces of wood (e.g., plywood or hardwood scraps).
Project 2: Basic Wooden Shelf
Progressing from coasters, a simple shelf introduces the concept of assembly. This project involves cutting longer pieces of wood for the shelf and supports, and then joining them using wood glue and screws. This allows for practice in measuring, cutting more accurately, drilling pilot holes for screws, and using a screwdriver effectively.
Skills Developed: Measuring, cutting, drilling, screwing, assembling.
Tools Required: Measuring tape, hand saw or miter saw, drill, screwdriver, wood glue, clamps (optional).
Materials Required: Wood planks (pine or similar softwood is recommended).
Project 3: Wooden Box
A wooden box presents a slightly more challenging undertaking. It requires precise cutting of multiple pieces to form the sides, bottom, and lid. This project reinforces accurate measuring and cutting, and introduces the concept of joinery – techniques for connecting pieces of wood together. A simple butt joint secured with wood glue and brads or screws can be employed initially.
Skills Developed: Precise measuring and cutting, joinery (butt joints), assembly, finishing.
Tools Required: Measuring tape, hand saw or miter saw, drill, screwdriver, brad nailer or hammer and brads, wood glue, clamps (optional), sanding tools, finish (optional).
Materials Required: Wood planks (consider using thinner wood for easier cutting).
Phase 2: Intermediate Woodworking Projects
Having mastered basic techniques, this phase introduces more complex designs and joinery methods, enhancing both skill and creativity.
Project 4: Simple Cutting Board
Creating a cutting board involves selecting a suitable hardwood (e.g., maple or cherry), cutting it to size, and paying close attention to safety considerations related to food preparation. This project hones the skill of planing for a perfectly flat surface and applying food-safe oil finishes.
Skills Developed: Planing, surface preparation, food-safe finishing.
Tools Required: Hand plane or jointer (if available), measuring tape, hand saw or miter saw, sandpaper, food-safe mineral oil or cutting board oil.
Materials Required: Hardwood board (ensure it is properly dried).
Project 5: Small Side Table
Constructing a small side table involves more complex joinery, such as dado joints or rabbet joints. This project requires meticulous planning, accurate cuts, and assembly using advanced techniques. It also introduces the selection of appropriate wood for strength and aesthetics.
Skills Developed: Advanced joinery (dadoes, rabbets), assembly, wood selection.
Tools Required: Measuring tape, saw (hand saw or miter saw, or table saw if available), chisel (for dadoes and rabbets), drill, screwdriver, clamps, sandpaper, finish (optional).
Materials Required: Wood planks (consider hardwood for strength and durability).
Project 6: Birdhouse
Building a birdhouse is a fun project that allows for creative expression. It involves multiple cuts, precise joinery to ensure structural integrity, and careful planning for the design and dimensions. This project is excellent for refining techniques and implementing decorative elements.
Skills Developed: Advanced joinery, detailed cutting, design considerations.
Tools Required: Measuring tape, saw (hand saw or miter saw, or jigsaw), drill, screwdriver, sandpaper, wood glue, finish (optional).
Materials Required: Wood planks or plywood, optional decorative elements.
Phase 3: Advanced Woodworking Projects
This phase involves significant challenges and requires a more comprehensive understanding of woodworking principles, design, and tool usage. These projects are ideal for those comfortable with the fundamentals and eager to tackle intricate designs.
Project 7: Wooden Chair
Constructing a simple chair represents a substantial undertaking. It requires expertise in various joinery techniques, careful consideration of ergonomics and stability, and advanced woodworking skills. This project demands accuracy, precision, and a deep understanding of structural integrity.
Skills Developed: Advanced joinery, structural design, ergonomics, finishing techniques.
Tools Required: Full range of woodworking tools (including a table saw, planer, jointer, possibly a router), clamps, specialized joinery tools.
Materials Required: High-quality hardwood, suitable for structural support.
Project 8: Small Desk or Table
Building a small desk or table requires a comprehensive understanding of woodworking principles, advanced joinery techniques, and precise measurements. This project might involve creating drawers, incorporating sophisticated joinery, and employing advanced finishing techniques.
Skills Developed: Advanced joinery, drawer construction, complex assembly, design and planning.
Tools Required: Full range of woodworking tools (including a table saw, planer, jointer, router, possibly a mortise and tenon jig), clamps, specialized joinery tools, finishing tools.
Materials Required: High-quality hardwood, appropriate hardware (e.g., drawer slides).
This progression provides a roadmap for beginners, enabling a gradual development of skills and confidence. Remember that safety is paramount. Always wear appropriate safety gear, use tools correctly, and work in a well-ventilated area. Enjoy the creative journey of woodworking!
Friday, January 31, 2025
Display Your Collectibles in Style with Curio Cabinet Woodworking Plans
Display Your Collectibles in Style with Curio Cabinet Woodworking Plans
Do you have a treasured collection of porcelain dolls, vintage toys, or meticulously crafted minerals? Are they currently crammed into boxes or haphazardly arranged on shelves, their beauty obscured? It's time to give your prized possessions the showcase they deserve. Building your own curio cabinet offers a unique and rewarding way to display your collectibles, allowing you to customize the design perfectly to your needs and style. This isn't just about storage; it's about creating a stunning focal point in your home, a testament to your passions and careful curation.
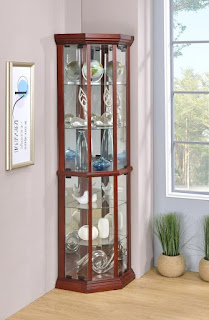
Why Build Your Own Curio Cabinet?
Forget mass-produced, generic display cases. Building your own curio cabinet provides several key advantages. First, you gain complete control over the design. Choose the dimensions, the wood type, the finish, and the number of shelves to perfectly complement your collection and your home's decor. Secondly, you save money. Custom-built curio cabinets can be exorbitantly expensive. By building it yourself, you only pay for the materials, significantly reducing the overall cost. Finally, the satisfaction of creating something beautiful and functional with your own hands is unparalleled. The pride you'll feel displaying your meticulously crafted cabinet, filled with your beloved treasures, is a reward in itself.
Choosing Your Wood and Design

Selecting the Right Wood
The choice of wood greatly impacts the final look and feel of your curio cabinet. Hardwoods like mahogany, cherry, or walnut offer a luxurious feel and exceptional durability. They're ideal for showcasing fine collectibles and will age gracefully. Softer woods like pine or poplar are more budget-friendly options, readily available and easier to work with for beginners. Consider the style of your home and the type of collectibles you'll be displaying when making your decision. A rustic farmhouse style might suit pine perfectly, while a more formal setting may demand the elegance of mahogany.
Designing Your Cabinet
Before you begin, meticulously plan your design. Consider the following:
- Dimensions: Measure your collection to determine the appropriate size and number of shelves.
- Style: Research different curio cabinet styles – from traditional to modern – to find inspiration.
- Lighting: Incorporate interior lighting to beautifully highlight your collectibles. LED strip lights offer energy efficiency and a subtle, even glow.
- Hardware: Choose knobs, hinges, and other hardware that complements your overall design.
- Glass: Select the type of glass that best protects your collection, considering factors like UV protection.
Finding and Using Woodworking Plans
Numerous resources are available for finding detailed woodworking plans for curio cabinets. Online platforms, woodworking magazines, and even library resources offer a wealth of options, from simple designs for beginners to complex projects for seasoned craftsmen. Remember to carefully review the plans before starting, ensuring you understand each step and possess the necessary tools. Don't hesitate to adjust the plans to better suit your specific needs and design preferences. A well-thought-out plan is crucial for a successful project. Take your time, and don't be afraid to seek advice from experienced woodworkers if you encounter challenges.
Showcasing Your Treasures
Once your stunning, handcrafted curio cabinet is complete, the true joy begins: arranging your prized possessions within its elegant confines. Take your time, carefully considering the placement of each item. Use lighting to highlight key pieces and create visual interest. The finished product will not only protect your collectibles but also become a captivating conversation starter, a testament to your skill and passion.
Beginner Furniture Plans for Simple and Easy Projects
Beginner Furniture Plans: Simple and Easy Projects to Build Confidence
Stepping into the world of woodworking can feel daunting, but it doesn't have to be! Building your own furniture offers immense satisfaction, and starting with simple projects is the key to success. These beginner-friendly plans focus on straightforward designs and readily available materials, allowing you to build confidence and skill with every piece. Forget those complex, intimidating blueprints – we're focusing on achievable projects that will have you proudly displaying your creations in no time.

A Simple Shelf: Your First Woodworking Victory
Beginners often overlook the humble shelf, but it's an excellent starting point. A simple, floating shelf requires minimal tools and materials. You'll learn basic measuring, cutting, and fastening techniques, without getting bogged down in intricate joinery. This project emphasizes accuracy and precision – essential skills for any woodworker. The clean lines of a finished shelf will reward your efforts and boost your confidence for more complex projects.

Materials You'll Need:
- Two pieces of wood for the shelf supports (choose a sturdy hardwood like oak or pine)
- One piece of wood for the shelf itself (consider a slightly wider board for a more substantial look)
- Wood screws
- Wall anchors (appropriate for your wall type)
- Wood glue
- Measuring tape
- Drill with appropriate drill bits
- Screwdriver
- Level
Step-by-Step Guide:
- Measure and cut your wood according to your desired shelf dimensions.
- Use a level to mark the locations for the shelf supports on the wall.
- Install wall anchors in the marked locations.
- Attach the shelf supports to the wall using wood screws.
- Place wood glue on the top surface of the shelf supports.
- Carefully rest the shelf on top of the supports and ensure it's level.
- Screw the shelf to the supports through pre-drilled pilot holes.
A Basic Wooden Box: Mastering Basic Joints
Moving beyond the shelf, a simple wooden box introduces you to fundamental joinery techniques. This project focuses on using butt joints and reinforcing them with wood glue and screws. You'll practice precise cuts, learn about wood grain direction, and understand the importance of strong, even glue application. Don't underestimate the satisfaction of creating a functional, attractive box from scratch!
Materials You'll Need:
- Six pieces of wood: two for the sides, two for the ends, and two for the base and lid.
- Wood glue
- Wood screws
- Sandpaper
- Measuring tape
- Saw (hand saw or miter saw)
- Clamps
Step-by-Step Guide:
- Cut the wood pieces to the desired size and ensure all sides are square.
- Apply wood glue to the edges of the sides and ends, then carefully assemble them.
- Clamp the box together to ensure a tight fit while the glue dries.
- Once the glue is dry, reinforce the joints with wood screws, pre-drilling pilot holes to prevent splitting.
- Repeat the process for the base and lid, then attach the base to the box.
- Sand the box to smooth any rough edges.
From Simple to Stunning: Building Your Woodworking Journey
These two projects form a solid foundation for your woodworking journey. Remember that practice makes perfect. Don't be afraid to make mistakes – they are valuable learning opportunities. As you gain experience, you can progress to more challenging furniture projects, employing more advanced joinery techniques and exploring diverse designs. The key is to start small, build confidence, and enjoy the process of creating something beautiful with your own two hands. Happy building!
Best Beginner Woodworking Projects for Fast Results
Jumpstart Your Woodworking Journey: Quick & Easy Beginner Projects
So, you're itching to get your hands dirty with woodworking, but the sheer number of possibilities feels overwhelming? Don't worry, you're not alone! Starting out can be a little daunting, but with the right projects, you can quickly build confidence and skills without spending months on a single piece. This guide is all about finding those fast, rewarding projects perfect for beginners. We'll focus on projects that deliver a sense of accomplishment quickly, teaching you fundamental techniques along the way.

Simple & Satisfying Shelf Projects
Shelves are fantastic beginner projects because they're functional, relatively easy to build, and offer a great way to learn essential skills like measuring, cutting, and assembling.

The Classic Floating Shelf
This project is all about clean lines and simplicity. You'll learn how to use a simple butt joint, a fundamental woodworking connection. You can find pre-cut wood at most home improvement stores, saving you time on the cutting. Focus on precise measurements and even spacing of the brackets for a professional-looking result. Once you've got the hang of this, you can experiment with different wood types and stains to personalize your creation.
Rustic Shelf with Brackets
This project adds a touch of character by using visible brackets. You'll still work with basic cuts and assembly, but the brackets add a decorative element and allow for a bit of creative freedom in choosing styles. This is a great project to practice using a level and ensuring your shelf is perfectly straight.
Multi-Tiered Corner Shelf
Stepping up the challenge slightly, a multi-tiered corner shelf requires more precise measurements and potentially some angled cuts. It's perfect for learning about angles and miter cuts. It's a more ambitious project, but the final product will be a stunning addition to any room. Don't be afraid to use a miter saw if you have access to one - it makes precise angled cuts a breeze!
Small & Mighty Box Projects
Boxes are another staple beginner project. They introduce you to a variety of joinery techniques, including simple butt joints, rabbet joints (for a more advanced look), and even dowel joints (with the help of a jig). The sky's the limit in terms of design and uses for a simple box.
The Basic Wooden Box
This is the absolute foundation. You'll learn how to cut your pieces to size, accurately assemble them using glue and maybe even nails or screws, and ensure everything is square. This is a great project to practice your measuring and sawing skills.
A Decorative Storage Box
This project allows you to add your personal touch! Consider adding decorative trim, painting or staining the wood, and adding a hinged lid. It will teach you about working with hinges and possibly even a simple latch. It's a fun way to experiment with finishes and personalization.
Beyond Shelves and Boxes: Other Quick Wins
There's a whole world of simple projects out there waiting for you!
Coasters
These are super fast projects, ideal for learning about sanding and finishing. You can use various wood types, shapes, and even incorporate things like resin for extra flair. Great for practicing your finishing techniques.
Cutting Boards
Slightly more challenging, cutting boards teach you about food-safe finishes and working with thicker wood. This is a great way to learn about safe wood choices for kitchen items. Make sure to research food-safe oils and finishes before beginning!
Simple Birdhouse
This is a rewarding project that lets you build something for the birds (and maybe even impress your neighbors!). It involves more intricate cuts and assembly, but readily available plans make it manageable for beginners. A perfect project to expand your skills and creativity.
Tips for Success:
- Start Small: Choose a project that's manageable and doesn't overwhelm you. It's better to finish a simple project successfully than to abandon a complex one.
- Read Instructions Carefully: Before you even touch your tools, take your time to thoroughly read any plans or instructions.
- Measure Twice, Cut Once: This age-old adage is crucial in woodworking. Accurate measurements are essential for a successful project.
- Invest in Basic Tools: You don't need a massive workshop to get started. A few essential hand tools will suffice in the beginning.
- Safety First!: Always wear safety glasses and appropriate hearing protection when using power tools.
- Don't Be Afraid to Ask for Help: There are countless online resources and woodworking communities ready to assist you.
- Embrace Imperfection: Your first few projects might not be perfect, and that's okay! Learn from your mistakes and keep practicing.
Frequently Asked Questions (FAQ)
Q: What tools do I need to start?
A: For most of these projects, you'll need a measuring tape, a pencil, a saw (hand saw or circular saw), sandpaper, wood glue, and possibly clamps.
Q: What kind of wood should I use?
A: Pine is a great beginner wood because it's relatively inexpensive, easy to work with, and readily available.
Q: Where can I find plans for these projects?
A: You can find plenty of free plans online through websites like Pinterest, Instructables, and YouTube.
Q: What if I make a mistake?
A: Don't worry! Mistakes happen. Sometimes you can fix them, other times you might need to start over. It's all part of the learning process.
Q: How long will these projects take?
A: The time it takes depends on your skill level and the complexity of the project. Simple projects like coasters might take an hour or two, while more complex projects could take a few days.
So there you have it! Don't let the fear of failure hold you back. Grab some wood, gather your tools, and get ready to enjoy the rewarding experience of creating something beautiful with your own hands. Happy woodworking!
Clever Woodworking Plans for Organizing Tools
Clever Woodworking Plans for Organizing Your Tool Chaos
Okay, fellow woodworkers, let's be honest. Our workshops… they can get a *little* wild, right? Tools everywhere, scraps piled high, and that nagging feeling that you've misplaced something vital (again!). But fear not! We're going to dive headfirst into some seriously clever woodworking plans to tame that beast and create a workshop you'll actually *enjoy* spending time in. These aren't your grandma's pegboards (though those are great too!), we're talking about projects that will impress your fellow woodworkers and make your workflow smoother than butter.

Wall-Mounted Tool Cabinets: More Than Just Pretty Faces
Forget flimsy plastic organizers. We're building something that will last – and look fantastic while doing it. A wall-mounted tool cabinet is a game-changer. It utilizes vertical space, keeps your tools dust-free and easily accessible, and adds a touch of professional-grade organization to your workshop.

Choosing the Right Wood and Design
The beauty of woodworking is the customization. You can choose a wood that matches your existing aesthetic, whether it's rustic reclaimed barn wood or sleek, modern cherry. Think about the size and layout too. Do you need a lot of shallow drawers for small tools, or a few larger ones for power tools? Planning is key here. Sketch out a few different designs before you even pick up your saw.
Building Your Cabinet: A Step-by-Step (ish) Guide
I won't bore you with exact measurements – those depend entirely on your tools and your space! But the general process will be similar:
- Cut your wood: Precise cuts are essential here. Use a good quality miter saw for the best results. Remember to account for the thickness of your wood when calculating dimensions.
- Assemble the frame: Use strong joinery like pocket holes or mortise and tenon joints for a robust cabinet.
- Install dividers and shelves: Consider using adjustable shelves for flexibility.
- Add doors or drawers: Depending on your design, you'll need to build and install these components. Good quality drawer slides are a must.
- Finish: Sand everything smooth and apply a finish that protects your wood and complements your workshop's style. A clear coat is a safe bet.
- Mount to the wall: Use heavy-duty wall anchors appropriate for the weight of your cabinet and the type of wall you have.
Rolling Tool Carts: Mobility is Key
Sometimes, you need your tools to come to you, not the other way around. A rolling tool cart is perfect for that. Whether it's moving from your workbench to a larger project or simply tidying up after a session, these carts are essential.
Designing Your Cart for Maximum Efficiency
Think about the tools you use most often and design the cart accordingly. Consider different sized drawers and open compartments for easy access. Adding a top surface will transform it into a mobile workstation. Don't forget sturdy, smooth-rolling casters!
Construction Tips:
Similar to the cabinet, precise cutting and sturdy joinery are crucial. A well-built cart will stand the test of time and countless moves. Consider adding a lip or edge to the top surface to prevent tools from sliding off. A little bit of extra planning goes a long way.
Overhead Storage Racks: Reaching for the Sky
Maximize your workshop space by building overhead storage racks. This is ideal for storing infrequently used items like lumber, extra clamps, or seasonal equipment. It keeps those items out of the way without sacrificing precious floor space.
Safety First!
Important Note: Make sure your overhead racks are securely fastened to the ceiling joists. You don't want anything falling on you! Use appropriately sized and rated fasteners for your situation.
Building Your Rack:
Simple designs are best here. You could use just 2x4s or 2x6s for the frame and shelving. Make sure to account for the weight you will be storing when choosing your wood and fasteners. Consider using angled supports for extra stability.
Beyond the Basics: Creative Tool Organization Ideas
Let's get creative! Here are some extra ideas to really personalize your workshop:
- Magnetic strips for small tools: Perfect for screwdrivers, chisels, and other metal tools.
- Pegboards with custom-cut inserts: Go beyond standard pegboard hooks and create custom-sized inserts to perfectly fit your tools.
- Drawer organizers: Keep your drawers tidy and organized with custom-built dividers.
- Hanging tool racks: Hang saws, levels, and other long tools on the wall to keep them safe and readily accessible.
Commonly Asked Questions
Q: What type of wood is best for these projects?
A: Hardwoods like maple, oak, or cherry are durable and beautiful. Pine or fir are more affordable options, but they might require more maintenance.
Q: What kind of finish should I use?
A: A clear polyurethane or varnish will protect your wood and make it easy to clean. Consider using a stain for added color.
Q: How do I choose the right wall anchors?
A: This depends on the weight of your project and the type of wall you have. Check your local hardware store for advice – they are a great resource. Don't hesitate to ask!
Q: I'm a beginner woodworker. Are these projects too difficult?
A: Some of these projects are more challenging than others. Start with something simple, like a tool cart or a small wall-mounted cabinet. Take your time, follow the instructions carefully, and don't be afraid to ask for help!
Remember, the key is to have fun and create a workshop that works for *you*. Don't be afraid to experiment and personalize these plans to fit your specific needs and style. Happy woodworking!
Outdoor Woodworking Plans for Your Backyard Creations
Outdoor Woodworking Plans for Your Backyard Creations
Transform your backyard into a personal woodworking haven with these detailed plans. Forget generic, mass-produced furniture; build unique pieces that reflect your style and skill. This guide provides inspiration and step-by-step instructions for several outdoor projects, perfect for beginners and experienced woodworkers alike. Prepare to unleash your creativity and enjoy the satisfaction of crafting beautiful, functional items for your outdoor space.

Building a Sturdy Garden Bench
A classic garden bench offers a relaxing spot to enjoy your yard. This project uses readily available materials and straightforward construction techniques. Begin by selecting durable, weather-resistant lumber like cedar or redwood. Precise measurements are key; carefully plan your dimensions based on your desired seating capacity and available space. You'll need to cut the lumber to create the legs, seat supports, and slats. Use wood screws or exterior-grade wood glue for assembly, ensuring each joint is strong and secure. Consider adding a finishing touch like a natural stain or sealant to protect the wood from the elements and enhance its appearance.

Detailed Construction Steps:
- Cut the lumber according to your pre-planned measurements.
- Assemble the legs using strong wood glue and screws.
- Attach the seat supports to the legs, ensuring they are level and sturdy.
- Install the seat slats, spacing them evenly for comfort and stability.
- Apply a weather-resistant sealant or stain for protection and aesthetic appeal.
Constructing a Charming Birdhouse
Attract feathered friends to your backyard by building a charming birdhouse. This project is ideal for beginners, offering a manageable challenge with rewarding results. Choose softwood like pine or fir for ease of carving and working. Design matters; consider the size and species of birds you want to attract when determining the dimensions of the entrance hole and the overall house size. Cut the wood pieces precisely to ensure a snug fit. Assemble the pieces using wood glue and small nails or screws, reinforcing joints for durability. Once complete, apply a weather-resistant coat of paint or stain. Remember to avoid using toxic paints or chemicals that could harm the birds.
Tips for Birdhouse Construction:
- Drill the entrance hole to the correct size for the intended bird species.
- Ensure adequate ventilation to prevent overheating inside the house.
- Use a non-toxic, weather-resistant finish.
- Mount the birdhouse in a safe location away from predators.
Crafting a Functional Planter Box
Enhance your garden's aesthetic appeal with a custom-built planter box. This project allows you to experiment with various designs and sizes, creating planters to suit your plants and the overall garden layout. You can build a simple rectangular planter or get creative with more elaborate designs. Material selection is vital; use rot-resistant wood like cedar or redwood for longevity. Build a sturdy frame, paying close attention to the bottom's construction to ensure proper drainage. Apply a weather-resistant sealant to protect the wood from moisture damage. Once finished, fill it with soil and plant your favorite flowers or herbs.
Designing Your Planter Box:
- Consider the size and type of plants you intend to grow.
- Choose a design that complements your existing garden style.
- Ensure the planter box has adequate drainage to prevent root rot.
- Use weather-resistant fasteners and sealants for durability.
These are just a few ideas to spark your imagination. With a little planning and effort, you can create beautiful and functional outdoor woodworking projects that enhance your backyard and bring you immense satisfaction. Remember safety first – always use appropriate safety gear and follow safe woodworking practices.
Design Safe and Functional Baby Furniture with These Creative Plans
Designing Safe & Functional Baby Furniture: Creative Plans for a Happy Home
Hey there, fellow parents-to-be and seasoned pros! Let's talk about baby furniture. It's more than just cute cribs and changing tables – it's about creating a safe and functional space for your little one to thrive. We're going to dive into some creative plans, focusing on both style and safety, because let's be honest, we want something that looks good *and* keeps our precious cargo secure.

The Crib: Sweet Dreams and Solid Safety
The crib is arguably the most important piece of baby furniture. Forget those flimsy, mass-produced models. Let's craft something special!

Material Matters:
Solid wood is your best bet. It's durable, less likely to break down, and easier to clean than particleboard or MDF. Look for sustainably sourced wood, if possible. Think about the finish too. Avoid anything with harsh chemicals; a non-toxic, water-based sealant is ideal. And please, ditch the drop-side cribs! They've been linked to serious accidents.
Design Dreams:
We can get creative here! Think beyond the standard four-poster. A simple, modern design with clean lines is always a good option. Or, if you're feeling ambitious, consider incorporating built-in storage underneath for diapers, wipes, and other essentials. How about a unique headboard design – perhaps a subtle, carved pattern or a playful pop of color?
Safety First:
This is non-negotiable. Ensure the crib slats are no more than 2 3/8 inches apart to prevent your little one from getting their head or body stuck. Make sure all screws are tight and check regularly for any damage or loose parts. Remember to remove the mattress support and any bumpers once your baby can sit up.
Changing Table: Comfort and Convenience
Changing tables are essential, but they don't have to be boring! Let's design one that's both practical and stylish.
Built-in or Standalone?
A built-in changing table can save space, especially in smaller nurseries. If you opt for a standalone version, consider one with multiple shelves or drawers for storing diapers, wipes, lotions, and other baby necessities.
Height and Stability:
The changing table's height is crucial. It should be comfortable for you to use and stable enough to prevent tipping. Consider adding a wide base for added stability. Always keep one hand on your baby at all times while changing their diaper.
Safety Features:
Install safety straps on the table to keep your baby secure. Choose a changing pad with raised sides to prevent your baby from rolling off. Never leave your baby unattended on the changing table, even for a second!
Dresser and Storage: Organized Chaos
Baby clothes, toys, diapers – the list goes on! Clever storage solutions are a must-have.
Maximize Space:
A tall dresser with multiple drawers offers ample storage. Consider a dresser with a built-in changing top, combining two essential pieces of furniture into one. You could even add pull-out baskets or bins for easy access to smaller items.
Style and Functionality:
Choose a dresser style that complements your nursery's décor. Natural wood finishes are always popular, but you can also opt for a painted dresser in a soft, calming color. Make sure the drawers are easy to open and close, even when they're full.
Safety Considerations:
Anchor the dresser to the wall to prevent it from tipping over. This is exceptionally important to prevent serious injury to your child. Consider using corner protectors to prevent bumps and bruises.
Rocking Chair or Glider: Moments of Calm
A comfortable rocking chair or glider is a must-have for soothing your little one. It's a sanctuary for those late-night feedings and quiet cuddles.
Comfort is Key:
Choose a chair with a comfortable seat and back. Consider the fabric – a soft, easy-to-clean material is a smart choice. Look for features like a footrest for extra support.
Style and Design:
Rocking chairs and gliders come in a variety of styles. Choose a chair that fits your nursery's decor and your personal taste. Consider the overall flow of the nursery's furniture design to ensure a cohesive and visually appealing space.
Practical Considerations:
Think about the chair's size and how much space it takes up. Measure your nursery to make sure you have enough room for the chair, plus space to move around it freely.
Beyond the Basics: Creative Touches
Let's add those unique personal touches to make your nursery truly special!
- Built-in Bookshelves: Integrate bookshelves into the wall to display your baby's books and create a cozy reading nook.
- Toy Storage Ottomans: Stylish storage that also doubles as seating.
- Custom-designed Wall Art: Create personalized artwork to reflect your baby's name or a special theme.
- Mobile Hanger: A custom-built, unique mobile hanger to hold different mobiles as your baby grows and changes their interests.
Commonly Asked Questions
Q: What is the best wood to use for baby furniture?
A: Hardwoods like maple, cherry, and oak are durable and long-lasting. Make sure the wood is finished with a non-toxic, child-safe sealant.
Q: How do I ensure my baby furniture is safe?
A: Always check for safety standards, ensure proper assembly, regularly inspect for damage, and anchor furniture to the wall where applicable.
Q: Where can I find plans for building my own baby furniture?
A: Online resources like Pinterest, Etsy, and various woodworking blogs offer many plans and tutorials. Remember to prioritize safety guidelines when following any plans.
Q: Is it worth building my own baby furniture?
A: It depends on your skills and time. Building your own furniture can be rewarding, but it requires time, tools, and skills. If you're unsure, buying pre-made, high-quality furniture is a perfectly valid option.
Creating a safe and stylish nursery for your little one is a labor of love. By carefully considering design, functionality, and safety, you can build or buy a space that's perfect for your family. Happy building (or shopping!), and remember, your baby's safety always comes first!
Custom Woodworking Plans for Personal Touches
Unlock Your Inner Craftsman: Crafting Custom Woodworking Plans for Personal Touches
The scent of freshly cut wood, the satisfying whir of the planer, the pride in creating something unique – woodworking offers a deeply rewarding experience. But beyond the simple pleasure of the craft itself lies the immense satisfaction of building something truly personal. This isn't about following pre-packaged instructions; it's about designing and constructing pieces that reflect your individual style, needs, and memories. This article will guide you through the process of developing your own custom woodworking plans, turning your creative vision into tangible reality.

From Inspiration to Design: Laying the Groundwork
Before you even pick up a pencil, let your imagination run wild. What piece of furniture or decorative item are you envisioning? Consider your existing décor, the space where the finished product will reside, and the overall aesthetic you want to achieve. Do you crave the rustic charm of reclaimed wood? The sleek elegance of modern minimalism? Or the intricate details of a traditional style? Browse online for inspiration, visit antique shops, or delve into woodworking magazines. Pinpoint specific elements that resonate with you – a particular leg style, a unique joinery technique, or a specific wood grain – these details will inform your design.

Gathering Your References
Once you have a general idea, start collecting images and sketches. These visual aids will act as your blueprint. Don't be afraid to combine elements from different sources. Perhaps you love the clean lines of a mid-century modern table but want to incorporate the hand-carved details of a traditional Shaker piece. This is where your personal touch truly shines! Create a mood board, either digitally or physically, to organize your inspirations and refine your vision.
Sketching and Planning: Bringing Your Vision to Life
With a clear vision in mind, it's time to translate your inspiration into a workable plan. Start by sketching your design on paper. Don't worry about perfection; these are initial sketches, meant to capture the essential elements of your project. Pay attention to proportions, dimensions, and the overall flow of the design. Consider the functionality of the piece: Will it be sturdy enough for its intended purpose? Are the joinery techniques appropriate for the materials you plan to use?
Detailed Measurements and Material Selection
Once you have a satisfactory sketch, you need to add precision. Measure every component carefully. Specify the exact dimensions of each piece, considering the thickness of the wood and the allowances for joinery. Choose your wood wisely. Consider the properties of different wood types – hardwoods for durability, softwoods for ease of carving, etc. Think about the final finish – will you stain it, paint it, or leave it natural? Selecting the right wood and finish is crucial for achieving your desired aesthetic.
Construction and Refinement: The Joy of Creation
Now comes the most rewarding part: building your creation! Follow your carefully crafted plans, taking your time and paying attention to detail. Don't hesitate to adjust your approach as you go; woodworking is an iterative process. Remember to check your measurements frequently and use appropriate tools and techniques for each step. Take pride in your craftsmanship; each cut, each joint, each sanding stroke contributes to the final masterpiece.
Embrace the Learning Process
Woodworking is a skill that develops over time. Don't be discouraged by initial challenges. Embrace the learning process, seek advice from experienced woodworkers, and don't be afraid to experiment. Each project you undertake will enhance your skills and expand your understanding of this versatile craft. The most important thing is to enjoy the journey of transforming your vision into a tangible object, imbued with your personal style and dedication.
Finally, remember that the imperfections often add to the charm of a handcrafted piece. Celebrate the unique character of your creation; it's a testament to your creativity and the time and effort you've invested.
Outdoor Garden Woodworking Projects for Beautiful Yard Features
Outdoor Garden Woodworking Projects for Beautiful Yard Features
The allure of a meticulously crafted outdoor space is undeniable. Transforming a simple garden into a haven of beauty and functionality often involves incorporating handcrafted elements. Woodworking, with its versatility and inherent connection to nature, offers an unparalleled opportunity to create stunning and personalized garden features. This exploration delves into various woodworking projects suitable for enhancing the aesthetic appeal and practical utility of any outdoor garden.

Arbors and Pergolas: Architectural Elegance in Wood
Arbors and pergolas, while distinct in their design, share a common goal: to provide shade, define spaces, and add architectural interest to the garden. Their inherent elegance stems from the graceful interplay of wood and open space. Choosing the right wood is paramount; species known for their durability and resistance to rot, such as cedar, redwood, or pressure-treated pine, are ideal for these outdoor structures.

Constructing an Arbor: A Step-by-Step Guide
Creating an arbor involves meticulous planning and execution. The initial step is designing the structure's dimensions and style. Consider the surrounding landscape and the overall aesthetic of your garden. Detailed blueprints, including precise measurements and cut lists, are essential to ensure accurate construction. The framework usually comprises sturdy vertical posts, connected by horizontal beams and decorative latticework. Proper joinery techniques, such as mortise and tenon or dado joints, are crucial for strength and longevity. Once the framework is complete, the latticework, often fashioned from thinner slats, can be added to create a visually appealing screen.
Pergola Design and Construction Considerations
Pergolas, typically larger and more expansive than arbors, often serve as focal points in larger gardens. They provide shade for seating areas or pathways. Construction principles are similar to arbor building, but on a larger scale. Planning for adequate support is vital, especially if the pergola is to support climbing plants or heavy roofing materials. Consider adding decorative features such as curved rafters or intricate detailing to enhance the structure's visual impact. Careful consideration of the chosen wood's ability to withstand the local climate is crucial for preventing premature deterioration.
Birdhouses and Feeders: Enriching Your Garden's Ecosystem
Attracting birds to your garden not only enhances its biodiversity but also adds a charming element to the overall landscape. Handcrafted birdhouses and feeders, made from durable and weather-resistant wood, offer a personalized touch, allowing you to create unique designs to complement your garden's aesthetic.
Building Functional and Attractive Birdhouses
Constructing a birdhouse necessitates attention to detail. Understanding bird species and their nesting preferences is key to creating a suitable habitat. The house's dimensions, entrance size, and ventilation are crucial factors. Use exterior-grade paint or sealant to protect the wood from the elements. Consider adding decorative touches, but ensure these additions do not compromise the bird's safety or the structural integrity of the house.
Designing and Crafting Bird Feeders
Bird feeders can be as simple or as elaborate as your woodworking skills allow. From basic platform feeders to more complex designs with hopper mechanisms, the options are diverse. Consider incorporating features that deter squirrels and other unwanted visitors. Ensure easy access for cleaning and refilling. The use of natural, untreated wood is preferable to avoid harmful chemicals impacting the birds.
Raised Garden Beds and Planters: Cultivating Beauty and Functionality
Raised garden beds and planters offer a practical and aesthetically pleasing way to organize and enhance your garden. They provide excellent drainage, improve soil quality, and allow for easier access to plants. Wood, with its natural warmth and versatility, is an excellent material for crafting these garden essentials.
Constructing Raised Garden Beds
Building raised garden beds involves selecting appropriate lumber, determining the desired size and shape, and constructing a sturdy framework. Ensure proper spacing between boards for drainage. You may choose to line the interior with landscape fabric to prevent weed growth and soil erosion. The height of the bed should be suitable for ease of access, especially for individuals with mobility limitations.
Crafting Attractive Planters from Wood
Wooden planters can be crafted in a variety of shapes and sizes, from simple rectangular boxes to more intricate designs. Consider using different types of wood to create visual interest. Proper sealing and waterproofing are critical to prevent water damage and prolong the life of the planter. Incorporating decorative elements, such as carved designs or metal accents, can further enhance the aesthetic appeal.
Other Creative Garden Woodworking Projects
Beyond the projects mentioned above, numerous other opportunities exist for enhancing your garden with handcrafted wooden features.
The possibilities are limited only by imagination and woodworking skills. Careful planning, the selection of appropriate materials, and precise execution are key to creating long-lasting and visually stunning garden features. Remember to prioritize safety when working with tools and always follow appropriate building codes and guidelines.
Free Online Woodworking Projects for Quick Access and Builds
Free Online Woodworking Projects for Quick Access and Builds
The internet has revolutionized access to information, and the realm of woodworking is no exception. Numerous websites and online communities offer a plethora of free woodworking projects, catering to all skill levels, from novice hobbyists to experienced craftsmen. This comprehensive guide provides a structured approach to navigating this wealth of online resources, focusing on readily accessible projects that can be completed relatively quickly.

Categorizing Online Woodworking Projects
The sheer volume of available projects can feel overwhelming. To efficiently locate suitable projects, it is crucial to categorize them based on several key factors:

Skill Level
Projects are often categorized by skill level, ranging from beginner to advanced. Beginners should focus on projects with straightforward instructions, minimal tools, and simple joinery techniques. Intermediate projects introduce more complex joinery and potentially the use of power tools. Advanced projects often involve intricate designs, specialized tools, and a high degree of precision.
- Beginner: Simple shelves, small boxes, coasters, birdhouses.
- Intermediate: Small tables, chairs, cutting boards, picture frames with more complex joinery.
- Advanced: Detailed furniture pieces, intricate carvings, curved elements, complex joinery techniques.
Time Commitment
The estimated time required for completion is a critical factor. Quick projects, ideal for beginners or those with limited time, might take a few hours to a day. More complex projects can extend over several days or even weeks.
Materials Required
Before embarking on any project, assess the availability and cost of materials. Some projects might require readily available lumber from local hardware stores, while others may necessitate sourcing more specialized woods or hardware.
Tool Requirements
The necessary tools also influence project selection. Beginners should focus on projects requiring basic hand tools, such as saws, chisels, and clamps. As skill levels increase, projects might necessitate power tools like routers, planers, and jointers.
Reliable Sources for Free Woodworking Plans
Numerous reputable online platforms provide free woodworking plans. It's essential to select reliable sources to ensure accurate instructions and safe project designs:
Woodworking Websites and Blogs
Many websites and blogs dedicated to woodworking offer free plans. These often include detailed instructions, diagrams, and sometimes even videos. Reputable sites often have active communities where users can ask questions and share their experiences.
Online Forums and Communities
Online woodworking forums and communities are valuable resources. Experienced woodworkers frequently share their plans and offer advice to beginners. These platforms provide a collaborative environment for learning and problem-solving.
YouTube Channels
YouTube channels dedicated to woodworking are a fantastic source of both plans and instructional videos. Many creators provide detailed tutorials, demonstrating each step of the project. However, always verify the credibility of the channel before following instructions.
Pinterest serves as a visual search engine, enabling users to find woodworking projects through image searches. While not always providing detailed plans, it can inspire ideas and lead to more comprehensive resources.
Evaluating Free Woodworking Plans
Before starting any project, carefully evaluate the provided plan:
Clarity and Detail of Instructions
The instructions should be clear, concise, and easy to understand. Ambiguous instructions can lead to errors and frustration. Look for plans with step-by-step guides, diagrams, and potentially videos.
Material List and Quantities
A comprehensive material list is essential. It should specify the types and quantities of lumber, hardware, and finishes required. Accurate material lists prevent unexpected delays and expenses.
Tool List
Similarly, a complete tool list is necessary to ensure you possess the necessary equipment before starting the project. This list should include both hand and power tools, as well as any specialized jigs or fixtures.
Safety Precautions
Reputable plans will emphasize safety precautions. Woodworking can be hazardous, and it's crucial to understand and follow safety guidelines to prevent injuries.
Project Difficulty Assessment
Accurately assess your skill level and the project's complexity. Choosing a project that is too difficult for your skill level can lead to frustration and potentially unsafe practices. Begin with simpler projects to build your confidence and skills before moving to more challenging ones.
Examples of Quick and Easy Woodworking Projects
Numerous quick and easy woodworking projects are perfect for beginners and those with limited time:
- Simple Shelves: Utilizing readily available lumber and basic joinery, shelves are a perfect starting point.
- Coasters: Small, decorative coasters provide an excellent opportunity to practice finishing techniques.
- Small Boxes: Basic box construction using simple joints helps develop fundamental woodworking skills.
- Key Holders: These small projects are ideal for experimenting with different wood types and finishes.
- Birdhouses: These projects are relatively straightforward and offer a rewarding outcome.
By carefully selecting online resources and following detailed instructions, even beginners can successfully complete rewarding woodworking projects. Remember to prioritize safety, start with simpler projects, and gradually increase complexity as skills and confidence grow. The world of online woodworking is a vast and constantly expanding resource, offering countless opportunities for creativity and self-expression.
Timeless Woodworking Plans for Farmhouse Tables
Timeless Woodworking Plans for Farmhouse Tables
The enduring appeal of the farmhouse table lies in its blend of rustic charm and sturdy practicality. These tables, often passed down through generations, represent more than just furniture; they embody family gatherings, shared meals, and cherished memories. This article provides detailed plans for crafting your own timeless farmhouse table, guiding you through each step with clarity and precision. Whether you're a seasoned woodworker or a beginner eager to learn, these plans empower you to build a piece that will be the heart of your home for years to come.

Choosing Your Lumber: The Foundation of Quality
Selecting the right lumber forms the bedrock of your project. Hardwoods like oak, maple, or walnut offer exceptional durability and a beautiful grain, guaranteeing a table that stands the test of time. Consider the character of the wood; knots, variations in color, and subtle imperfections add to the rustic charm of a farmhouse table. Source your lumber from reputable suppliers who prioritize quality and sustainability. Carefully inspect each board for defects before beginning the project. Remember to allow for proper acclimation of the wood to your workshop's environment to prevent warping or cracking during construction. Proper planning and material selection prevents future headaches and guarantees a stunning final product.

Understanding Wood Grades and Species
Different wood species exhibit unique properties. Oak, for instance, boasts exceptional strength and resistance to wear, making it ideal for high-traffic areas. Maple provides a clean, lighter aesthetic, while walnut offers rich, dark tones. Understanding the grade of the lumber is crucial; higher grades generally mean fewer knots and imperfections. However, embrace the natural character of the wood; the knots and grain variations add unique personality to your finished table. Research different species and grades to choose the perfect lumber that reflects your style and budget.
Building the Tabletop: The Heart of the Farmhouse Style
Constructing the tabletop involves precision and patience. Begin by carefully milling your selected boards to the desired thickness and width. This step ensures consistent dimensions across the entire tabletop. Then, join the boards using either a traditional tongue-and-groove method or a more modern biscuit-joining technique. The choice depends on your skill level and the tools you possess. For a truly rustic look, consider leaving slight gaps between boards for a charming, reclaimed aesthetic. Once joined, meticulously sand the tabletop until it's smooth and even, ready for finishing. Pay close attention to detail during this stage; a smooth, flawless tabletop enhances the overall beauty of your creation.
Jointing Techniques: A Closer Look
Several joining methods create a strong and visually appealing tabletop. Tongue-and-groove joints offer exceptional strength and a classic look. They require precise cuts, but the result is a durable and aesthetically pleasing connection. Biscuit joints provide a simpler alternative, offering excellent strength while being less demanding of your woodworking skills. Consider the complexity of each method and your skill level when choosing the best approach for your project. Proper jointing techniques are key to a long-lasting, beautiful tabletop.
Constructing the Base: Strength and Style Combined
The base of your farmhouse table is equally important; it provides stability and enhances the overall design. A classic farmhouse style often features sturdy, slightly tapered legs connected by a robust apron. You can create the legs from individual pieces of lumber, carefully shaping and joining them for a seamless look. The apron, typically composed of thick planks, adds both strength and visual interest. Ensure all joints are securely fastened using appropriate joinery techniques and wood glue. Proper assembly is crucial for a stable and long-lasting table.
Leg Styles and Apron Design
Explore various leg styles to find the perfect complement to your tabletop. Straight, slightly tapered legs offer a clean, modern farmhouse aesthetic. Consider adding decorative elements like turned feet or subtle carvings for added visual appeal. The apron can be a simple rectangular design, or you can explore more intricate patterns, depending on your skill level and aesthetic preferences. Remember to proportion the base to the size of the tabletop to maintain a balanced and visually appealing design.
Finishing Touches: Protecting Your Masterpiece
Once the table is assembled, it's time to apply a protective finish. Choose a finish that enhances the natural beauty of the wood while providing lasting protection against scratches and spills. Consider options like polyurethane, varnish, or a natural oil-based finish. Apply multiple coats, allowing each coat to dry completely before applying the next. Sand lightly between coats for a smoother finish. A well-applied finish protects your investment and ensures your beautiful farmhouse table remains a cherished heirloom for years to come. Take your time with this stage; the finish significantly impacts the final look and feel of your handcrafted piece.