Saturday, February 1, 2025
Master Your Craft with These Detailed Woodworking Plans
Master Your Craft with These Detailed Woodworking Plans
Woodworking, a craft steeped in history and precision, demands both artistry and technical skill. This comprehensive guide delves into the essential elements of crafting detailed woodworking plans, empowering you to transform raw lumber into exquisite creations. From conceptualization to final finish, we will explore the intricacies of plan development, ensuring your projects are not only aesthetically pleasing but also structurally sound and safe.

Phase 1: Conceptualization and Design
The foundation of any successful woodworking project lies in meticulous planning. A well-defined plan minimizes errors, optimizes material usage, and ensures the final product meets your expectations. This phase involves translating your vision into a tangible blueprint.

Defining Project Scope and Objectives
Before diving into intricate details, clearly articulate the project's purpose and desired outcome. Ask yourself: What is the intended function of the piece? What are its key aesthetic features? What materials will be used? Defining these parameters early on prevents scope creep and ensures your efforts remain focused.
Sketching and Preliminary Drawings
Begin with freehand sketches to capture the overall design and proportions. These sketches serve as a visual roadmap, allowing you to explore different design iterations and refine your concept. Pay close attention to the relationships between various components and their spatial arrangement.
Creating Detailed Working Drawings
Once the initial design is solidified, transition to detailed working drawings. These drawings should be precise, including dimensions, angles, and joinery details. Consider using specialized woodworking software or drafting tools to ensure accuracy. Include notes specifying materials, hardware, and finishing techniques.
- Orthographic Projections: Utilize multiple views (front, side, top) to represent the object's three-dimensional form accurately.
- Isometric Drawings: These 3D representations offer a clearer visualization of the project's overall structure.
- Detailed Views: Enlarge critical areas, such as joinery details, to ensure clarity and prevent misinterpretations.
- Material Specifications: Specify the type, grade, and dimensions of lumber required for each component.
- Hardware List: Include a comprehensive list of all necessary hardware, such as screws, bolts, hinges, and dowels.
Phase 2: Material Selection and Preparation
The quality of your materials directly impacts the final product's durability and aesthetic appeal. Selecting appropriate lumber and preparing it correctly is crucial for a successful outcome.
Choosing the Right Lumber
The selection of lumber depends on the project's requirements and your budget. Consider factors like species, grade, moisture content, and dimensional stability. Hardwoods generally offer superior strength and durability, while softwoods are often more affordable and easier to work with.
Assessing Lumber Quality
Before purchasing lumber, carefully inspect each board for defects such as knots, cracks, and warping. Select boards that are free from significant imperfections to ensure the structural integrity of your project. Assess the straightness and consistency of the grain pattern.
Preparing the Lumber
Proper lumber preparation is essential for achieving precise cuts and accurate joinery. This often involves:
- Planing: Removing any irregularities from the surface to create a smooth, flat plane.
- Jointing: Creating a perfectly straight and square edge.
- Rip Cutting: Cutting the lumber to the required width.
- Cross Cutting: Cutting the lumber to the required length.
- Moisture Metering: Checking the moisture content to ensure it is within acceptable ranges for your specific project and climate.
Phase 3: Construction and Assembly
This phase involves bringing your detailed plans to life. Accurate cuts, precise joinery, and methodical assembly are key to creating a structurally sound and aesthetically pleasing piece.
Accurate Cutting and Shaping
Utilizing appropriate tools, such as miter saws, table saws, and hand saws, execute precise cuts according to your plans. Employ jigs and fixtures for repetitive cuts to maintain consistency and accuracy. Ensure squareness and avoid any deviations from the specified dimensions.
Joinery Techniques
The selection of joinery techniques significantly influences the strength and aesthetic appeal of your project. Consider the following:
- Butt Joints: Simple, but require strong glue and often additional reinforcement.
- Lap Joints: Offer more strength than butt joints, with various subtypes like half-lap and through-lap.
- Dovetail Joints: Extremely strong and visually appealing, but require more skill and precision.
- Mortise and Tenon Joints: Strong and versatile, suitable for various applications.
- Dado Joints: Used for shelving and other similar applications, offering good strength and stability.
Assembly and Clamping
Assemble the components carefully, ensuring proper alignment and adherence to your plans. Use appropriate clamps to hold the pieces securely in place while the glue dries. Avoid excessive clamping pressure to prevent warping or damage.
Phase 4: Finishing Touches
The final phase involves enhancing the appearance and durability of your finished project. Proper finishing protects the wood and enhances its natural beauty.
Sanding and Smoothing
Sanding is crucial for creating a smooth, even surface. Start with coarser grit sandpaper and gradually progress to finer grits for a flawless finish. Pay attention to detail, ensuring all surfaces are smooth to the touch.
Applying Finishes
A wide variety of finishes are available, each offering different levels of protection and aesthetic qualities. Consider the following:
- Stains: Enhance the wood's natural color and grain pattern.
- Paints: Provide a durable and protective coating with a variety of colors and finishes.
- Varnishes: Offer excellent protection against moisture and scratches.
- Polyurethanes: Durable and water-resistant, available in various sheens.
- Shellac: A traditional finish that creates a warm, amber tone.
Final Inspection and Quality Control
Before declaring your project complete, conduct a thorough inspection to ensure it meets your expectations and is free from defects. Check for any imperfections in the finish, loose joints, or other issues that may need attention.
By meticulously following these steps and applying careful consideration to each stage, you can elevate your woodworking skills and create exquisite pieces that reflect your craftsmanship. Remember that patience, precision, and a commitment to detail are the hallmarks of a master woodworker.
Personalized Woodworking Plans for Tailored and Custom Creations
Unlock Your Inner Craftsman: Personalized Woodworking Plans for Tailored Creations
Tired of generic woodworking projects that lack personality? Yearning to build something truly unique, reflecting your style and skill? Then step into the exciting world of personalized woodworking plans! Forget sifting through generic designs; discover how customized blueprints empower you to create furniture, home décor, and unique gifts perfectly tailored to your vision. This isn't about following instructions; it's about designing and building your dream project from the ground up.

The Power of Personalized Woodworking Plans
Personalized woodworking plans offer a level of control and customization unavailable with pre-made kits. Imagine crafting a stunning bookshelf perfectly fitted to your living room's alcove, or building a custom-sized coffee table that complements your existing furniture. This level of precision ensures a flawless fit and a truly integrated piece within your home. It's not simply about functionality; it's about creating a lasting piece of art that speaks to your individual taste. These plans aren't just instructions; they're blueprints for your unique creative expression.

Beyond the Generic: Tailoring to Your Needs
Forget cookie-cutter designs. Personalized woodworking plans allow you to specify dimensions, materials, and even intricate design elements. Do you envision a rustic, farmhouse-style table or a sleek, modern coffee table? Perhaps you need a specialized storage solution for your workshop, or a custom-built toy box for your children. With personalized plans, you provide the specifications, and the plan adapts to your exact requirements. This ensures the finished product not only looks fantastic but also performs its intended function flawlessly.
From Concept to Creation: The Personalized Process
The process of creating personalized woodworking plans typically begins with a consultation. You'll discuss your vision with a skilled designer who will help refine your ideas and translate them into detailed, workable blueprints. This collaborative approach ensures your project reflects your aesthetic preferences and technical capabilities. The designer will consider factors such as material selection, joinery techniques, and overall structural integrity to create a plan that is both visually appealing and structurally sound.
Steps to Your Dream Project:
- Initial Consultation: Discuss your project's purpose, style, and dimensions.
- Design Development: The designer creates detailed plans based on your specifications.
- Plan Review and Refinement: You review the plans and suggest modifications as needed.
- Material Selection: Choose the wood species and finishes that best suit your vision.
- Construction: Follow the customized plans to build your one-of-a-kind project.
Investing in Your Craft: The Benefits of Personalized Plans
While the initial cost might seem higher than pre-made plans, the benefits are significant. Personalized woodworking plans save you time and frustration by eliminating the need to adapt generic designs to your unique needs. The detailed blueprints minimize errors, reducing material waste and ensuring a successful outcome. Moreover, the pride and satisfaction of crafting something truly unique far outweighs any additional expense. You're not just building a project; you're building a legacy.
Embrace the possibilities of personalized woodworking plans. Transform your woodworking hobby into a journey of creative self-expression. Start designing your dream project today!
Woodworking Projects for Beginners: From Simple to Advanced Builds
Woodworking Projects for Beginners: From Simple to Advanced Builds
Woodworking offers a rewarding blend of creativity, problem-solving, and tangible results. Whether you're drawn to the artistry of fine furniture or the practicality of functional items, the world of woodworking welcomes all skill levels. This comprehensive guide provides a structured progression of woodworking projects, starting with beginner-friendly tasks and gradually increasing in complexity, ensuring a satisfying learning experience for aspiring woodworkers.

Phase 1: Foundational Skills & Simple Projects
Before embarking on ambitious builds, mastering fundamental woodworking techniques is crucial. This initial phase focuses on developing essential skills and confidence through straightforward projects requiring minimal tools and materials.

Project 1: Simple Wooden Coasters
This project serves as an excellent introduction to basic woodworking techniques. It involves cutting square pieces of wood (approximately 4x4 inches), sanding the edges for smoothness, and optionally applying a finish like varnish or paint. The focus is on learning to use a saw (hand saw or miter saw) accurately and safely, and mastering the art of sanding to achieve a smooth, professional finish.
Skills Developed: Measuring, cutting, sanding, finishing.
Tools Required: Measuring tape, hand saw or miter saw, sandpaper (various grits), wood glue (optional), finish (optional).
Materials Required: Small pieces of wood (e.g., plywood or hardwood scraps).
Project 2: Basic Wooden Shelf
Progressing from coasters, a simple shelf introduces the concept of assembly. This project involves cutting longer pieces of wood for the shelf and supports, and then joining them using wood glue and screws. This allows for practice in measuring, cutting more accurately, drilling pilot holes for screws, and using a screwdriver effectively.
Skills Developed: Measuring, cutting, drilling, screwing, assembling.
Tools Required: Measuring tape, hand saw or miter saw, drill, screwdriver, wood glue, clamps (optional).
Materials Required: Wood planks (pine or similar softwood is recommended).
Project 3: Wooden Box
A wooden box presents a slightly more challenging undertaking. It requires precise cutting of multiple pieces to form the sides, bottom, and lid. This project reinforces accurate measuring and cutting, and introduces the concept of joinery – techniques for connecting pieces of wood together. A simple butt joint secured with wood glue and brads or screws can be employed initially.
Skills Developed: Precise measuring and cutting, joinery (butt joints), assembly, finishing.
Tools Required: Measuring tape, hand saw or miter saw, drill, screwdriver, brad nailer or hammer and brads, wood glue, clamps (optional), sanding tools, finish (optional).
Materials Required: Wood planks (consider using thinner wood for easier cutting).
Phase 2: Intermediate Woodworking Projects
Having mastered basic techniques, this phase introduces more complex designs and joinery methods, enhancing both skill and creativity.
Project 4: Simple Cutting Board
Creating a cutting board involves selecting a suitable hardwood (e.g., maple or cherry), cutting it to size, and paying close attention to safety considerations related to food preparation. This project hones the skill of planing for a perfectly flat surface and applying food-safe oil finishes.
Skills Developed: Planing, surface preparation, food-safe finishing.
Tools Required: Hand plane or jointer (if available), measuring tape, hand saw or miter saw, sandpaper, food-safe mineral oil or cutting board oil.
Materials Required: Hardwood board (ensure it is properly dried).
Project 5: Small Side Table
Constructing a small side table involves more complex joinery, such as dado joints or rabbet joints. This project requires meticulous planning, accurate cuts, and assembly using advanced techniques. It also introduces the selection of appropriate wood for strength and aesthetics.
Skills Developed: Advanced joinery (dadoes, rabbets), assembly, wood selection.
Tools Required: Measuring tape, saw (hand saw or miter saw, or table saw if available), chisel (for dadoes and rabbets), drill, screwdriver, clamps, sandpaper, finish (optional).
Materials Required: Wood planks (consider hardwood for strength and durability).
Project 6: Birdhouse
Building a birdhouse is a fun project that allows for creative expression. It involves multiple cuts, precise joinery to ensure structural integrity, and careful planning for the design and dimensions. This project is excellent for refining techniques and implementing decorative elements.
Skills Developed: Advanced joinery, detailed cutting, design considerations.
Tools Required: Measuring tape, saw (hand saw or miter saw, or jigsaw), drill, screwdriver, sandpaper, wood glue, finish (optional).
Materials Required: Wood planks or plywood, optional decorative elements.
Phase 3: Advanced Woodworking Projects
This phase involves significant challenges and requires a more comprehensive understanding of woodworking principles, design, and tool usage. These projects are ideal for those comfortable with the fundamentals and eager to tackle intricate designs.
Project 7: Wooden Chair
Constructing a simple chair represents a substantial undertaking. It requires expertise in various joinery techniques, careful consideration of ergonomics and stability, and advanced woodworking skills. This project demands accuracy, precision, and a deep understanding of structural integrity.
Skills Developed: Advanced joinery, structural design, ergonomics, finishing techniques.
Tools Required: Full range of woodworking tools (including a table saw, planer, jointer, possibly a router), clamps, specialized joinery tools.
Materials Required: High-quality hardwood, suitable for structural support.
Project 8: Small Desk or Table
Building a small desk or table requires a comprehensive understanding of woodworking principles, advanced joinery techniques, and precise measurements. This project might involve creating drawers, incorporating sophisticated joinery, and employing advanced finishing techniques.
Skills Developed: Advanced joinery, drawer construction, complex assembly, design and planning.
Tools Required: Full range of woodworking tools (including a table saw, planer, jointer, router, possibly a mortise and tenon jig), clamps, specialized joinery tools, finishing tools.
Materials Required: High-quality hardwood, appropriate hardware (e.g., drawer slides).
This progression provides a roadmap for beginners, enabling a gradual development of skills and confidence. Remember that safety is paramount. Always wear appropriate safety gear, use tools correctly, and work in a well-ventilated area. Enjoy the creative journey of woodworking!
Friday, January 31, 2025
Display Your Collectibles in Style with Curio Cabinet Woodworking Plans
Display Your Collectibles in Style with Curio Cabinet Woodworking Plans
Do you have a treasured collection of porcelain dolls, vintage toys, or meticulously crafted minerals? Are they currently crammed into boxes or haphazardly arranged on shelves, their beauty obscured? It's time to give your prized possessions the showcase they deserve. Building your own curio cabinet offers a unique and rewarding way to display your collectibles, allowing you to customize the design perfectly to your needs and style. This isn't just about storage; it's about creating a stunning focal point in your home, a testament to your passions and careful curation.
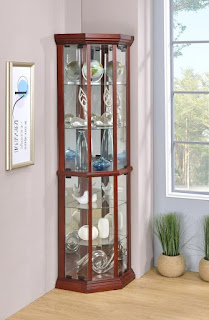
Why Build Your Own Curio Cabinet?
Forget mass-produced, generic display cases. Building your own curio cabinet provides several key advantages. First, you gain complete control over the design. Choose the dimensions, the wood type, the finish, and the number of shelves to perfectly complement your collection and your home's decor. Secondly, you save money. Custom-built curio cabinets can be exorbitantly expensive. By building it yourself, you only pay for the materials, significantly reducing the overall cost. Finally, the satisfaction of creating something beautiful and functional with your own hands is unparalleled. The pride you'll feel displaying your meticulously crafted cabinet, filled with your beloved treasures, is a reward in itself.
Choosing Your Wood and Design

Selecting the Right Wood
The choice of wood greatly impacts the final look and feel of your curio cabinet. Hardwoods like mahogany, cherry, or walnut offer a luxurious feel and exceptional durability. They're ideal for showcasing fine collectibles and will age gracefully. Softer woods like pine or poplar are more budget-friendly options, readily available and easier to work with for beginners. Consider the style of your home and the type of collectibles you'll be displaying when making your decision. A rustic farmhouse style might suit pine perfectly, while a more formal setting may demand the elegance of mahogany.
Designing Your Cabinet
Before you begin, meticulously plan your design. Consider the following:
- Dimensions: Measure your collection to determine the appropriate size and number of shelves.
- Style: Research different curio cabinet styles – from traditional to modern – to find inspiration.
- Lighting: Incorporate interior lighting to beautifully highlight your collectibles. LED strip lights offer energy efficiency and a subtle, even glow.
- Hardware: Choose knobs, hinges, and other hardware that complements your overall design.
- Glass: Select the type of glass that best protects your collection, considering factors like UV protection.
Finding and Using Woodworking Plans
Numerous resources are available for finding detailed woodworking plans for curio cabinets. Online platforms, woodworking magazines, and even library resources offer a wealth of options, from simple designs for beginners to complex projects for seasoned craftsmen. Remember to carefully review the plans before starting, ensuring you understand each step and possess the necessary tools. Don't hesitate to adjust the plans to better suit your specific needs and design preferences. A well-thought-out plan is crucial for a successful project. Take your time, and don't be afraid to seek advice from experienced woodworkers if you encounter challenges.
Showcasing Your Treasures
Once your stunning, handcrafted curio cabinet is complete, the true joy begins: arranging your prized possessions within its elegant confines. Take your time, carefully considering the placement of each item. Use lighting to highlight key pieces and create visual interest. The finished product will not only protect your collectibles but also become a captivating conversation starter, a testament to your skill and passion.
Beginner Furniture Plans for Simple and Easy Projects
Beginner Furniture Plans: Simple and Easy Projects to Build Confidence
Stepping into the world of woodworking can feel daunting, but it doesn't have to be! Building your own furniture offers immense satisfaction, and starting with simple projects is the key to success. These beginner-friendly plans focus on straightforward designs and readily available materials, allowing you to build confidence and skill with every piece. Forget those complex, intimidating blueprints – we're focusing on achievable projects that will have you proudly displaying your creations in no time.

A Simple Shelf: Your First Woodworking Victory
Beginners often overlook the humble shelf, but it's an excellent starting point. A simple, floating shelf requires minimal tools and materials. You'll learn basic measuring, cutting, and fastening techniques, without getting bogged down in intricate joinery. This project emphasizes accuracy and precision – essential skills for any woodworker. The clean lines of a finished shelf will reward your efforts and boost your confidence for more complex projects.

Materials You'll Need:
- Two pieces of wood for the shelf supports (choose a sturdy hardwood like oak or pine)
- One piece of wood for the shelf itself (consider a slightly wider board for a more substantial look)
- Wood screws
- Wall anchors (appropriate for your wall type)
- Wood glue
- Measuring tape
- Drill with appropriate drill bits
- Screwdriver
- Level
Step-by-Step Guide:
- Measure and cut your wood according to your desired shelf dimensions.
- Use a level to mark the locations for the shelf supports on the wall.
- Install wall anchors in the marked locations.
- Attach the shelf supports to the wall using wood screws.
- Place wood glue on the top surface of the shelf supports.
- Carefully rest the shelf on top of the supports and ensure it's level.
- Screw the shelf to the supports through pre-drilled pilot holes.
A Basic Wooden Box: Mastering Basic Joints
Moving beyond the shelf, a simple wooden box introduces you to fundamental joinery techniques. This project focuses on using butt joints and reinforcing them with wood glue and screws. You'll practice precise cuts, learn about wood grain direction, and understand the importance of strong, even glue application. Don't underestimate the satisfaction of creating a functional, attractive box from scratch!
Materials You'll Need:
- Six pieces of wood: two for the sides, two for the ends, and two for the base and lid.
- Wood glue
- Wood screws
- Sandpaper
- Measuring tape
- Saw (hand saw or miter saw)
- Clamps
Step-by-Step Guide:
- Cut the wood pieces to the desired size and ensure all sides are square.
- Apply wood glue to the edges of the sides and ends, then carefully assemble them.
- Clamp the box together to ensure a tight fit while the glue dries.
- Once the glue is dry, reinforce the joints with wood screws, pre-drilling pilot holes to prevent splitting.
- Repeat the process for the base and lid, then attach the base to the box.
- Sand the box to smooth any rough edges.
From Simple to Stunning: Building Your Woodworking Journey
These two projects form a solid foundation for your woodworking journey. Remember that practice makes perfect. Don't be afraid to make mistakes – they are valuable learning opportunities. As you gain experience, you can progress to more challenging furniture projects, employing more advanced joinery techniques and exploring diverse designs. The key is to start small, build confidence, and enjoy the process of creating something beautiful with your own two hands. Happy building!
Best Beginner Woodworking Projects for Fast Results
Jumpstart Your Woodworking Journey: Quick & Easy Beginner Projects
So, you're itching to get your hands dirty with woodworking, but the sheer number of possibilities feels overwhelming? Don't worry, you're not alone! Starting out can be a little daunting, but with the right projects, you can quickly build confidence and skills without spending months on a single piece. This guide is all about finding those fast, rewarding projects perfect for beginners. We'll focus on projects that deliver a sense of accomplishment quickly, teaching you fundamental techniques along the way.

Simple & Satisfying Shelf Projects
Shelves are fantastic beginner projects because they're functional, relatively easy to build, and offer a great way to learn essential skills like measuring, cutting, and assembling.

The Classic Floating Shelf
This project is all about clean lines and simplicity. You'll learn how to use a simple butt joint, a fundamental woodworking connection. You can find pre-cut wood at most home improvement stores, saving you time on the cutting. Focus on precise measurements and even spacing of the brackets for a professional-looking result. Once you've got the hang of this, you can experiment with different wood types and stains to personalize your creation.
Rustic Shelf with Brackets
This project adds a touch of character by using visible brackets. You'll still work with basic cuts and assembly, but the brackets add a decorative element and allow for a bit of creative freedom in choosing styles. This is a great project to practice using a level and ensuring your shelf is perfectly straight.
Multi-Tiered Corner Shelf
Stepping up the challenge slightly, a multi-tiered corner shelf requires more precise measurements and potentially some angled cuts. It's perfect for learning about angles and miter cuts. It's a more ambitious project, but the final product will be a stunning addition to any room. Don't be afraid to use a miter saw if you have access to one - it makes precise angled cuts a breeze!
Small & Mighty Box Projects
Boxes are another staple beginner project. They introduce you to a variety of joinery techniques, including simple butt joints, rabbet joints (for a more advanced look), and even dowel joints (with the help of a jig). The sky's the limit in terms of design and uses for a simple box.
The Basic Wooden Box
This is the absolute foundation. You'll learn how to cut your pieces to size, accurately assemble them using glue and maybe even nails or screws, and ensure everything is square. This is a great project to practice your measuring and sawing skills.
A Decorative Storage Box
This project allows you to add your personal touch! Consider adding decorative trim, painting or staining the wood, and adding a hinged lid. It will teach you about working with hinges and possibly even a simple latch. It's a fun way to experiment with finishes and personalization.
Beyond Shelves and Boxes: Other Quick Wins
There's a whole world of simple projects out there waiting for you!
Coasters
These are super fast projects, ideal for learning about sanding and finishing. You can use various wood types, shapes, and even incorporate things like resin for extra flair. Great for practicing your finishing techniques.
Cutting Boards
Slightly more challenging, cutting boards teach you about food-safe finishes and working with thicker wood. This is a great way to learn about safe wood choices for kitchen items. Make sure to research food-safe oils and finishes before beginning!
Simple Birdhouse
This is a rewarding project that lets you build something for the birds (and maybe even impress your neighbors!). It involves more intricate cuts and assembly, but readily available plans make it manageable for beginners. A perfect project to expand your skills and creativity.
Tips for Success:
- Start Small: Choose a project that's manageable and doesn't overwhelm you. It's better to finish a simple project successfully than to abandon a complex one.
- Read Instructions Carefully: Before you even touch your tools, take your time to thoroughly read any plans or instructions.
- Measure Twice, Cut Once: This age-old adage is crucial in woodworking. Accurate measurements are essential for a successful project.
- Invest in Basic Tools: You don't need a massive workshop to get started. A few essential hand tools will suffice in the beginning.
- Safety First!: Always wear safety glasses and appropriate hearing protection when using power tools.
- Don't Be Afraid to Ask for Help: There are countless online resources and woodworking communities ready to assist you.
- Embrace Imperfection: Your first few projects might not be perfect, and that's okay! Learn from your mistakes and keep practicing.
Frequently Asked Questions (FAQ)
Q: What tools do I need to start?
A: For most of these projects, you'll need a measuring tape, a pencil, a saw (hand saw or circular saw), sandpaper, wood glue, and possibly clamps.
Q: What kind of wood should I use?
A: Pine is a great beginner wood because it's relatively inexpensive, easy to work with, and readily available.
Q: Where can I find plans for these projects?
A: You can find plenty of free plans online through websites like Pinterest, Instructables, and YouTube.
Q: What if I make a mistake?
A: Don't worry! Mistakes happen. Sometimes you can fix them, other times you might need to start over. It's all part of the learning process.
Q: How long will these projects take?
A: The time it takes depends on your skill level and the complexity of the project. Simple projects like coasters might take an hour or two, while more complex projects could take a few days.
So there you have it! Don't let the fear of failure hold you back. Grab some wood, gather your tools, and get ready to enjoy the rewarding experience of creating something beautiful with your own hands. Happy woodworking!
Clever Woodworking Plans for Organizing Tools
Clever Woodworking Plans for Organizing Your Tool Chaos
Okay, fellow woodworkers, let's be honest. Our workshops… they can get a *little* wild, right? Tools everywhere, scraps piled high, and that nagging feeling that you've misplaced something vital (again!). But fear not! We're going to dive headfirst into some seriously clever woodworking plans to tame that beast and create a workshop you'll actually *enjoy* spending time in. These aren't your grandma's pegboards (though those are great too!), we're talking about projects that will impress your fellow woodworkers and make your workflow smoother than butter.

Wall-Mounted Tool Cabinets: More Than Just Pretty Faces
Forget flimsy plastic organizers. We're building something that will last – and look fantastic while doing it. A wall-mounted tool cabinet is a game-changer. It utilizes vertical space, keeps your tools dust-free and easily accessible, and adds a touch of professional-grade organization to your workshop.

Choosing the Right Wood and Design
The beauty of woodworking is the customization. You can choose a wood that matches your existing aesthetic, whether it's rustic reclaimed barn wood or sleek, modern cherry. Think about the size and layout too. Do you need a lot of shallow drawers for small tools, or a few larger ones for power tools? Planning is key here. Sketch out a few different designs before you even pick up your saw.
Building Your Cabinet: A Step-by-Step (ish) Guide
I won't bore you with exact measurements – those depend entirely on your tools and your space! But the general process will be similar:
- Cut your wood: Precise cuts are essential here. Use a good quality miter saw for the best results. Remember to account for the thickness of your wood when calculating dimensions.
- Assemble the frame: Use strong joinery like pocket holes or mortise and tenon joints for a robust cabinet.
- Install dividers and shelves: Consider using adjustable shelves for flexibility.
- Add doors or drawers: Depending on your design, you'll need to build and install these components. Good quality drawer slides are a must.
- Finish: Sand everything smooth and apply a finish that protects your wood and complements your workshop's style. A clear coat is a safe bet.
- Mount to the wall: Use heavy-duty wall anchors appropriate for the weight of your cabinet and the type of wall you have.
Rolling Tool Carts: Mobility is Key
Sometimes, you need your tools to come to you, not the other way around. A rolling tool cart is perfect for that. Whether it's moving from your workbench to a larger project or simply tidying up after a session, these carts are essential.
Designing Your Cart for Maximum Efficiency
Think about the tools you use most often and design the cart accordingly. Consider different sized drawers and open compartments for easy access. Adding a top surface will transform it into a mobile workstation. Don't forget sturdy, smooth-rolling casters!
Construction Tips:
Similar to the cabinet, precise cutting and sturdy joinery are crucial. A well-built cart will stand the test of time and countless moves. Consider adding a lip or edge to the top surface to prevent tools from sliding off. A little bit of extra planning goes a long way.
Overhead Storage Racks: Reaching for the Sky
Maximize your workshop space by building overhead storage racks. This is ideal for storing infrequently used items like lumber, extra clamps, or seasonal equipment. It keeps those items out of the way without sacrificing precious floor space.
Safety First!
Important Note: Make sure your overhead racks are securely fastened to the ceiling joists. You don't want anything falling on you! Use appropriately sized and rated fasteners for your situation.
Building Your Rack:
Simple designs are best here. You could use just 2x4s or 2x6s for the frame and shelving. Make sure to account for the weight you will be storing when choosing your wood and fasteners. Consider using angled supports for extra stability.
Beyond the Basics: Creative Tool Organization Ideas
Let's get creative! Here are some extra ideas to really personalize your workshop:
- Magnetic strips for small tools: Perfect for screwdrivers, chisels, and other metal tools.
- Pegboards with custom-cut inserts: Go beyond standard pegboard hooks and create custom-sized inserts to perfectly fit your tools.
- Drawer organizers: Keep your drawers tidy and organized with custom-built dividers.
- Hanging tool racks: Hang saws, levels, and other long tools on the wall to keep them safe and readily accessible.
Commonly Asked Questions
Q: What type of wood is best for these projects?
A: Hardwoods like maple, oak, or cherry are durable and beautiful. Pine or fir are more affordable options, but they might require more maintenance.
Q: What kind of finish should I use?
A: A clear polyurethane or varnish will protect your wood and make it easy to clean. Consider using a stain for added color.
Q: How do I choose the right wall anchors?
A: This depends on the weight of your project and the type of wall you have. Check your local hardware store for advice – they are a great resource. Don't hesitate to ask!
Q: I'm a beginner woodworker. Are these projects too difficult?
A: Some of these projects are more challenging than others. Start with something simple, like a tool cart or a small wall-mounted cabinet. Take your time, follow the instructions carefully, and don't be afraid to ask for help!
Remember, the key is to have fun and create a workshop that works for *you*. Don't be afraid to experiment and personalize these plans to fit your specific needs and style. Happy woodworking!